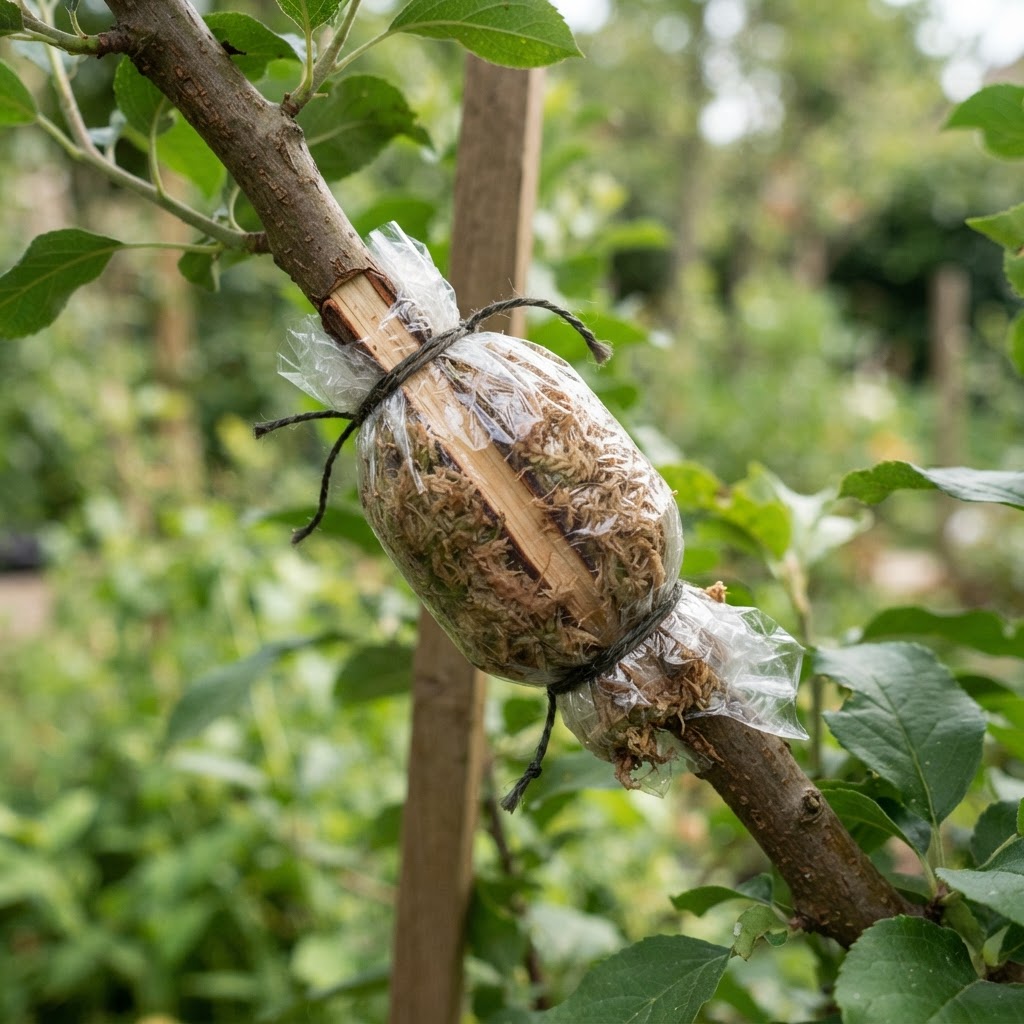
The advanced propagation technique for woody plants. Learn how to root stems while still attached to the parent plant for higher success rates.
What Is Air Layering?
Air layering is an advanced propagation technique where you encourage roots to grow on a stem while it's still attached to the parent plant. Once roots form, you cut the stem below the new roots and plant it.
This method is ideal for:
- Woody plants that don't root well from cuttings
- Fiddle leaf figs — notoriously difficult to propagate otherwise
- Rubber plants (Ficus elastica)
- Crotons and other tough-stemmed plants
- Citrus trees and other fruiting woody plants
- Large, mature plants where you want a substantial new plant immediately
Why Air Layering Works
Air layering exploits a plant's natural wound-healing response. By making a wound on the stem and keeping it moist and dark, you trick the plant into forming roots at that point — before the cutting is ever removed.
The advantages are significant:
- Higher success rate — The cutting stays attached to the parent and receives water and nutrients throughout rooting
- Larger new plants — You can air layer a thick, mature stem and get a substantial plant immediately
- Works on difficult species — Many woody plants that refuse to root from cuttings will air layer successfully
What You'll Need
- A healthy, mature plant with a suitable stem
- Clean, sharp knife
- Sphagnum moss (pre-soaked)
- Plastic wrap
- Twist ties or string
- Roots Down Propagation Gel
- Roots Down Root Booster
- Aluminum foil (optional, to block light)
Step-by-Step: Air Layering
Step 1: Choose the Right Stem
Select a healthy, woody stem that's at least pencil-thick. The stem should be 1-2 years old — not too green, not too woody. Look for a section 12-18 inches from the tip.
Step 2: Make the Wound
There are two wound styles:
Method A: Girdling (Ring Cut)
- Make two parallel cuts around the stem, about 1 inch apart
- Cut through the bark and cambium layer (the green layer under the bark)
- Remove the strip of bark between the cuts
- This completely interrupts the flow of nutrients, forcing them to accumulate at the wound
Method B: Slant Cut (Tongue Method)
- Make a single upward slanting cut about 1/3 through the stem
- Insert a toothpick to keep the cut open
- This is less damaging but slightly less reliable
Step 3: Apply Rooting Gel
Apply Roots Down Propagation Gel generously to the wounded area. The auxins will stimulate root initiation at the wound site.
Step 4: Apply Sphagnum Moss
Take a handful of pre-soaked sphagnum moss and pack it around the wound. The moss should be thoroughly moist but not dripping. Cover a 3-4 inch section of stem centered on the wound.
Step 5: Wrap in Plastic
Wrap plastic wrap or a plastic bag around the moss, completely enclosing it. Secure the top and bottom with twist ties or string. The plastic retains moisture and creates the dark, humid environment roots need.
Step 6: Cover with Foil (Optional)
Wrap aluminum foil over the plastic. This blocks light, which can inhibit root formation, and also helps regulate temperature.
Step 7: Maintain and Wait
- Check periodically — Every 1-2 weeks, unwrap and check the moss moisture
- Re-moisten if dry — Spray with plain water if the moss is drying out
- Patience — Air layering takes 4-12 weeks depending on the plant
Step 8: Check for Roots
After 4 weeks, carefully unwrap the moss and check for roots. You should see white roots growing through the moss. If no roots yet, re-wrap and wait longer.
Step 9: Remove and Pot
Once you see a healthy mass of roots:
- Cut the stem just below the rooted section
- Remove the plastic and moss, being gentle with the new roots
- Pot in well-draining soil
- Keep in bright, indirect light
- Water thoroughly and apply Roots Down Root Booster to the root zone
- Use Mother's Mist for ongoing nutrient support
Best Plants for Air Layering
- Fiddle Leaf Fig (Ficus lyrata) — The #1 reason people try air layering
- Rubber Plant (Ficus elastica) — Roots readily with air layering
- Croton — Colorful foliage plant, roots well
- Magnolia — Woody ornamental
- Citrus trees — Lemon, lime, orange trees
- Dracaena — Tall, woody houseplants
- Dieffenbachia — Dumb cane, roots easily
Troubleshooting Air Layering
The moss dried out
Check more frequently and re-moisten with Roots Down Root Booster. The plastic must be sealed properly to retain moisture.
No roots after 12 weeks
The wound may have healed over. Re-make the wound and reapply Roots Down Propagation Gel. Some species take longer.
The stem rotted
Too much moisture or the wound was too deep. Start over with a fresh stem and be less aggressive with the cut.
Pro Tips
- Air layer in spring or summer when plants are actively growing
- Use sharp, clean tools — Dull tools crush tissue and increase infection risk
- Be generous with Roots Down Propagation Gel — The auxin boost is critical for woody stems
- Keep the moss moist — Check every 1-2 weeks
- Be patient — Air layering is slow but highly effective
- Start with a rubber plant — They're the easiest to air layer
Ready to Try Air Layering?
Grab your Roots Down Propagation Gel and Roots Down Root Booster and master this advanced technique. For simpler methods, see our water propagation and soil propagation guides.